How to Install a Patio Door: A Pro’s Guide to a Perfect Fit
Want to know how to install a patio door? This guide walks you through every step, from preparing the opening to the finishing touches.
Key Takeaways
- Preparation is key; ensure you have all necessary tools and accurately measure the rough opening before installation.
- Proper framing and securing of the sill pan are crucial to prevent structural issues and water infiltration during the installation process.
- Regular maintenance, including cleaning and lubricating tracks and replacing worn weatherstripping, is essential for the longevity and smooth operation of your patio door.
Safety First: Protect Yourself Before You Begin
Although installing a patio door can be a rewarding DIY project, it can also be a high-risk activity; that’s why it requires careful attention to safety to avoid injuries. So before you get started:
- Wear protective gear: Safety glasses shield your eyes from flying debris. Gloves protect your hands from sharp edges and splinters. Steel-toed boots safeguard your feet, and a dust mask prevents inhalation of insulation particles and dust.
- Work with a partner: Patio doors can weigh between 100 and 200 pounds. That’s why heavy lifting should never be a solo job to prevent strains or accidents.
- Beware of electrical hazards: Before drilling near walls, disconnect power to nearby outlets and use a stud finder to locate hidden wiring or plumbing.
- Use tools safely: Handle sharp tools, such as reciprocating saws, carefully and always follow the manufacturer’s instructions.
- Know your limits: If any step feels beyond your comfort or skill level, especially when dealing with load-bearing walls or structural modifications, consult a professional to ensure safety and compliance.
Prioritizing your safety from the start helps you establish a foundation for a successful, accident-free installation. If you are still unsure about handling your project with safety, contact us for professional installation and peace of mind.
Tools and Materials Needed for Patio Door Installation
Gathering all the necessary tools and materials before starting the installation process makes the job easier and establishes a smooth and efficient installation. Tools needed for installing a patio door include:
- Reciprocating saw
- Pry bar
- Impact driver
- Drill
- Level
The level is essential for checking that the door frame is fixed plumb before securing it.
Outside these tools, a utility knife helps make precise cuts, while wood shims guarantee the door frame is level and properly aligned. Plus, minimal expanding foam insulation fills any voids between the door frame and the rough opening, providing a snug fit and improving energy efficiency.
Additional materials for patio door installation include flashing tape, insulation foam, and brad nails.
Having a complete set of tools and materials at your disposal saves time and prevents unnecessary interruptions. Double-check that you have access to all necessary resources before you begin.
Permits and Regulations: Know the Rules Before You Start
Before cutting into walls or altering your home’s structure for a patio door, it’s critical to check local building codes and obtain any necessary permits. Many jurisdictions require permits for:
- Structural modifications, including creating or enlarging rough openings.
- Alterations to load-bearing walls.
- Doors wider than 6 feet that serve as emergency exits which may have specific egress requirements.
- Compliance with energy efficiency standards like ENERGY STAR ratings.
- Accessibility considerations, such as ADA-compliant thresholds under 0.5 inches.
Here’s how to get started:
- Contact your city or county building department, or use online tools like the Permit Finder online directory for your city, to understand the permit requirements for your area.
- If you live in a Homeowners Association (HOA), make sure to get approval before proceeding to avoid fines or violations.
- Be prepared to submit project plans and potentially wait for inspections during and after installation.
Ignoring permits can lead to fines, delays, and insurance issues, so planning ahead ensures a smooth, legal process.
Preparing the Rough Opening
The first step in installing a patio door is preparing the rough opening to ensure the door fits perfectly and operates smoothly. This involves:
- Making the rough opening approximately 2 to 2.5 inches wider than the door’s dimensions.
- Making the rough opening approximately 2 to 2.25 inches taller than the door’s dimensions.
- Allowing space for shimming and leveling.
- Confirming these dimensions by measuring horizontally and vertically across the opening before installing the new sliding glass door.
If the existing rough opening is not square, use the smallest measurements from both vertical and horizontal sides to order the appropriate new door size. Double-checking these measurements ensures the open door fits properly.
Framing the Opening
Proper framing is vital to ensure the sliding doors are installed plumb, level, and square. The rough opening needs to be 2 to 2.5 inches wider and 2 to 2.25 inches taller than the door’s dimensions to accommodate shimming and leveling.
Securely fastening the headers to the framing maintains structural integrity, especially when replacing an old door or working with an existing opening. Proper framing maintains stability and prevents issues such as misalignment or operational difficulties.
Installing the Header
In load-bearing walls, installing headers that can support the weight above the sliding glass door is just as important. For most installations, double or triple 2×10 headers may be required based on the span and load capacity needed.
If unsure about the load-bearing capabilities of your wall, seek professional assistance to ensure structural integrity and safety. Our team at Modern Restoration are happy to help you!
Installing the Sill Pan
The sill pan prevents water infiltration and structural damage. Install the sill pan by placing a cant strip sloped toward the exterior at approximately 1/4 inch per foot for proper drainage. However, make sure the area is clean and debris-free before placing the sill pan to create a proper seal.
Secure the sill pan and sill plate with screws, ensuring it fits snugly within the opening to avoid leaks. This step protects your home from water damage and ensures the longevity of your patio door installation.
Weatherproofing the Opening
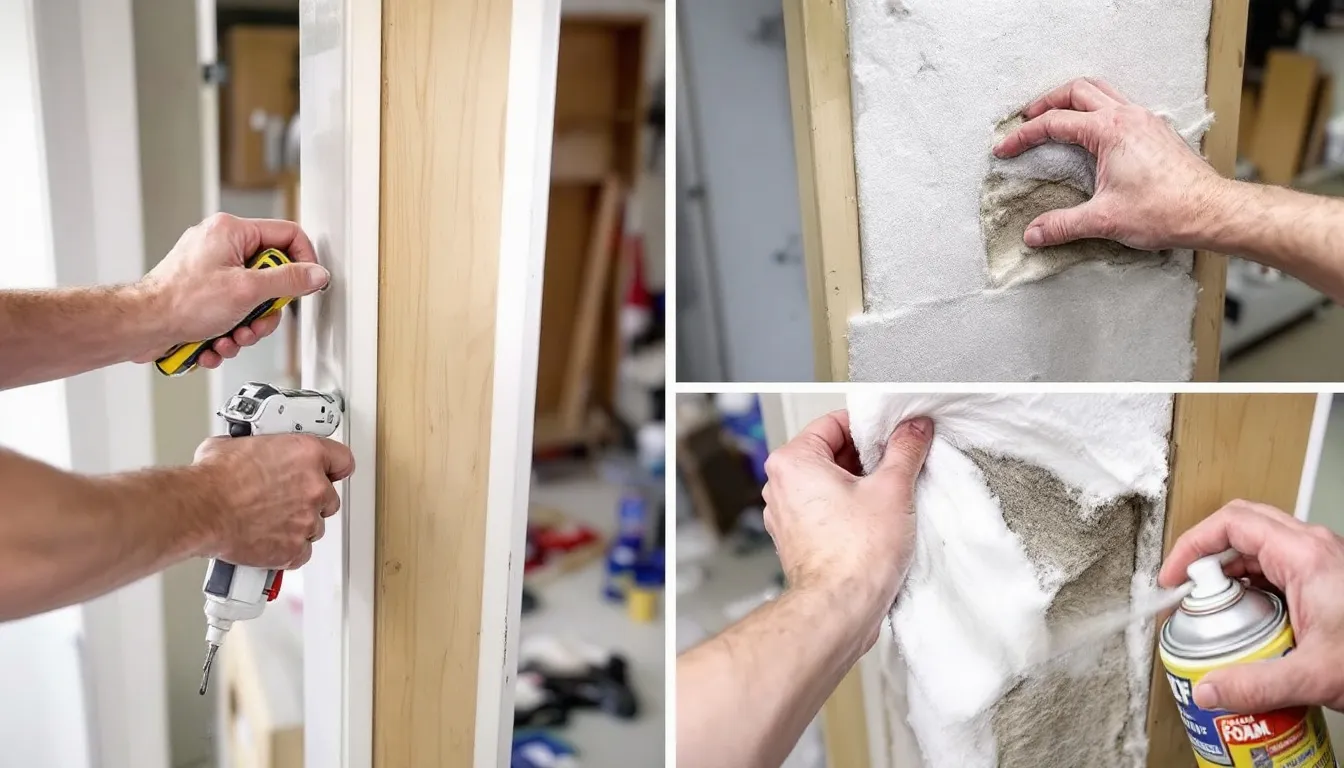
Weatherproofing the opening prevents energy losses and protects your home from the elements, since poor sealing can waste up to 30% of heating and cooling costs. Flashing systems direct water away from the door frame, preventing leaks and damage.
To do this, apply a weatherproof sealant around the nailing flange to prevent water infiltration and ensure the casing is properly sealed.
To guarantee proper installation of the sill pan:
- Install the sill pan with a slight slope towards the outside for proper drainage.
- Confirm the area is clean and debris-free before placing the sill pan.
- Ensure a proper seal and snug fit within the opening to avoid leaks.
Also use silicone caulk to seal gaps and confirm weatherproofing around the door frame.
Installing the Patio Door
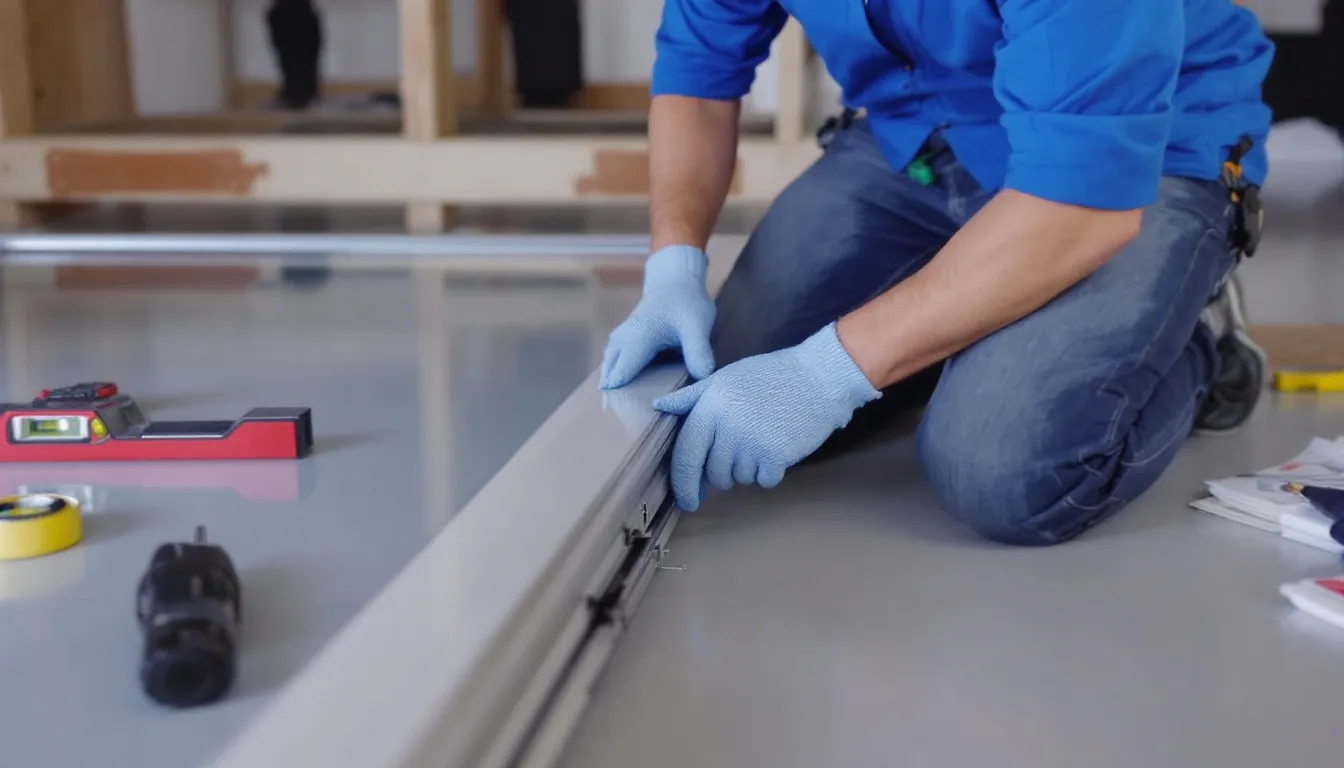
To begin, place the door in the opening and check for proper alignment before securing it. Use a level tool to verify the door is both level and plumb.
Once aligned, secure the door frame to the surrounding structure using screws. Apply weather stripping to the door frame and track to create a tight seal that blocks drafts and increases energy efficiency.
Securing the Nailing Flange
Securing the nailing flange ensures the stability of the patio door and helps prevent water infiltration. Attach the nailing flange directly to the exterior wall using nails, verifying proper alignment with the wall framing for a tight seal.
Finishing Touches and Adjustments
Once the patio door is installed, perform finishing touches and adjustments for smooth operation and a polished look. Regularly adjust the door rollers to ensure the sliding panel operates smoothly and aligns properly with the strike plate.
Clean the rollers and replace damaged ones to improve the performance of sliding patio doors.
Start by using finishing nails to secure the door’s brick mould to the framing, adding stability. Carefully measure and attach interior trim with a finish nail to upgrade the look of the installation.
Finally, seal and finish the surrounding area to prevent water infiltration, air leakage, and heat loss.
Common Mistakes to Avoid
One common mistake to avoid is Improper measurement, as this can lead to air leaks, difficulty closing the door, or even structural damage over time.
Another is an inadequately sized rough opening, which can lead to operational issues with the sliding glass door and complicate installation.
Lastly, over-shim affects door alignment and can cause hardware malfunctions. Ultimately, ensuring the doors are plumb and level prevents sticking, premature wear, or coming off track.
Avoid costly installation mistakes! Let our experts handle your patio door project for a perfect fit.
Maintenance Tips for Longevity
How do you ensure that your patio door is long lasting? Firstly, clean and lubricate the track with silicone-based products for smooth operation. Regular maintenance of the track and rollers prevents issues and extends the door’s life.
Replacing worn weatherstripping maintains insulation and prevents drafts in the house. Upgrading to new rollers can also increase the functionality of the sliding door and make it easier to sit and operate by allowing the window to open smoothly.
Additionally, ensuring the slide mechanism is in good condition can further improve performance.
Summary
As consistently stated across this guide, installing a patio door is a rewarding project that can transform your living space by bringing in more natural light and providing easy access to the outdoors.
Make your living space brighter and more accessible by partnering with trusted patio door experts. Reach out today and see how easy it is to get started.
Frequently Asked Questions
Here are a few frequently asked questions:
What are the standard widths and heights for patio doors?
Patio doors typically have standard widths ranging from 60 to 144 inches and heights from 80 to 96 inches. It’s important to choose dimensions that suit your space while ensuring functionality.
What can improper measurement during patio door installation lead to?
Improper measurement during patio door installation can result in air leaks, operational issues, and potential structural damage. Ensuring accurate measurements is crucial for a proper fit and long-term functionality.
Can I open up my wall to install a patio door?
Yes, you can open up your wall to install a patio door, but ensure you seek professional guidance to maintain structural integrity and safety.
What steps are involved in the installation of a patio door?
To properly install a patio door, begin by measuring and cutting openings for the header and supporting posts, followed by removing wall studs and framing the header. Next, install the door jambs, hang the patio doors, and seal the surrounding area for a secure fit.
What should be done after the patio door is installed?
After installing the patio door, it is essential to seal and finish the surrounding area to prevent water infiltration, air leakage, and heat loss. This will ensure the door’s efficiency and longevity.